Hello my Foodie Friends!
I love Pasta. There, I said it. It is a weakness I have. Homemade pasta is a bigger weakness. Once you experience homemade pasta, it is close to impossible to go back to the store brand pastas. Making homemade pasta can require extra time – but it is worth it. If you haven’t ventured past the convenience of dried pasta, it’s time to make some changes in your life. We have nothing against dried pasta — there is definitely a time and a place for it, and in fact, sometimes there’s nothing better for a quick and satisfying weeknight dinner. If you’ve ever tried homemade pasta, however, you understand what pasta is really all about. Homemade pasta is a little chewy and very tender; it really does just melt in your mouth. It may sound difficult, but making your own pasta is actually much easier than you might think. Fresh pasta comes together quite quickly. Mixing and kneading the dough takes about 10 minutes, then you let it rest for 30 minutes. You can use this resting time to pull together the ingredients for the pasta sauce. After resting, rolling out and cutting, the dough takes maybe another 10 to 20 minutes, depending on how fast you go and how many helpers you have.
Speaking of helpers, it helps to have a few. You can definitely do it by yourself, but it’s really nice to have an extra set of hands, especially if you’re hand-cranking the dough through a counter-top pasta roller. Whether working by yourself or with someone else, I find that you fall into a rhythm of rolling the sheets of pasta, cutting the noodles, and sprinkling everything with flour.
Once you’ve made your pasta, you can cook it right away, dry it, or freeze it for later. When you do cook it, remember that homemade pasta cooks much more quickly than the dried pasta you buy in stores. Give it about four minutes in salted boiling water, taste it, and keep checking in one-minute increments until the pasta is al dente. Add spinich or carrots to create more colorful pastas. What’s fun about these pastas is that the dough is really colorful and contains very concentrated vegetable juices, but they don’t have an overt vegetable taste. They are delicious, and I am pretty sure they could still pass a picky eaters taste test. Unless the picky eater hates colors.
Stop by Compliments to the Chef located at 33 Railroad Place to pick up a Marcato Atlas Pasta machine and other pasta accessories. Plan an evening with Italian wine and appetizers and then roll up your sleeves to make pasta from scratch. Work your magic in the kitchen. Enjoy dinner al fresco (Caesar salad, bread, pasta, chicken Marsala, tiramisu for dessert and, of course, finished with home-made limoncello) and share an evening with great company and interesting conversation – all the ingredients for a truly memorable meal. Remember; “Life Happens in the Kitchen.” “Mangia.”
Take Care,
John & Paula
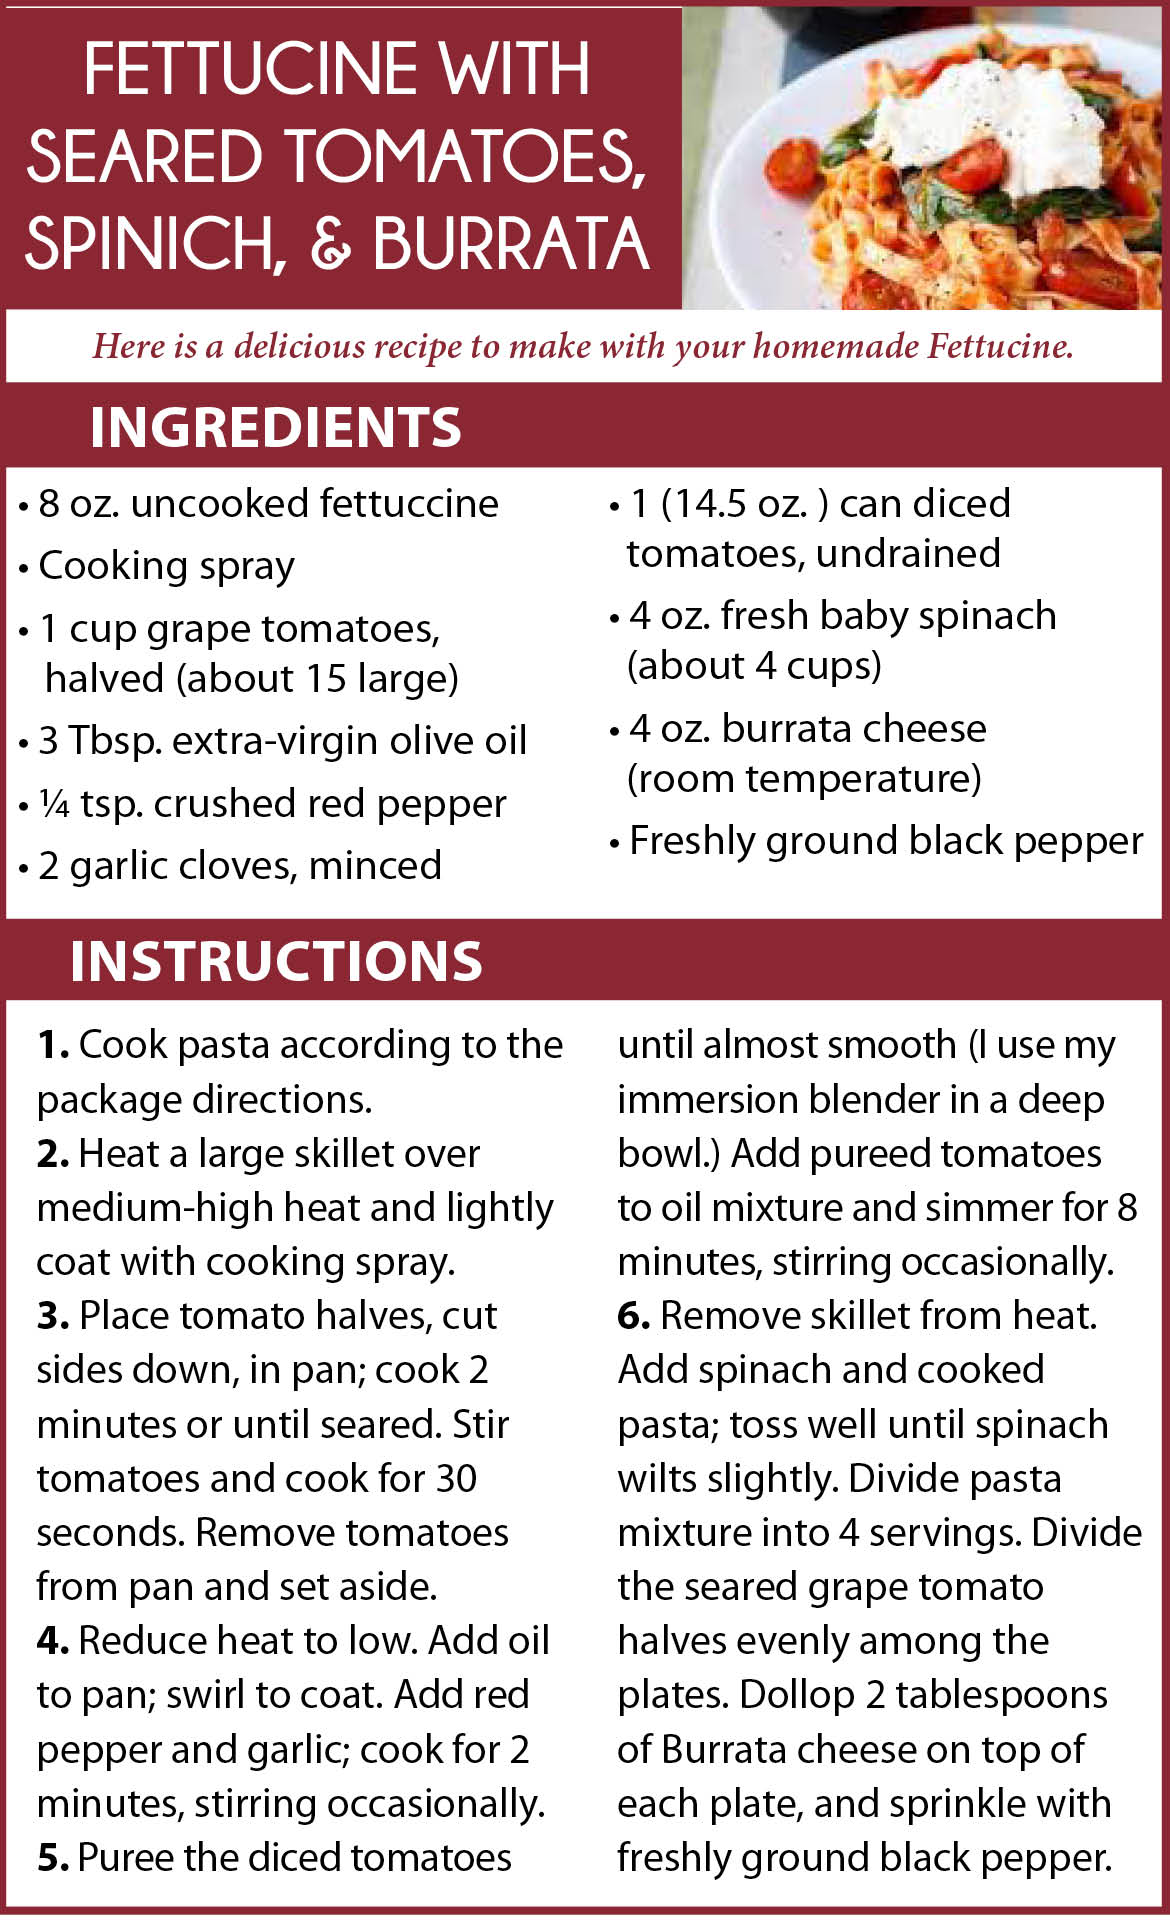
FRESH EGG PASTA
4 to 6 servings
Ingredients:
• 3 large eggs
• 2 cups flour, plus extra for rolling the pasta
• 1/2 teaspoon salt
Equipment:
• Mixing bowl
• Fork or dough whisk
• Pasta machine
• Baking sheet
• Clean dishtowel
Instructions:
1. Combine the Flour and Salt: Whisk together flour and salt with a fork in a mixing bowl.
2. Add the Eggs: Create a deep well in the middle of the flour and crack the eggs into this well. Whisk the eggs to combine.
3. Begin Combining the Flour and Eggs: As you whisk the eggs, begin gradually pulling in flour from the bottom and sides of the bowl. Don’t rush this step. At first, the eggs will start to look like a slurry. Once enough flour has been added, it will start forming a very soft dough. Don’t worry if you haven’t used all the flour.
4. Knead the Pasta Dough: Turn the dough and any excess flour out onto a clean counter. Begin gently folding the dough on itself, flattening, and folding again. It will be extremely soft at first, then gradually start to firm up. Once it’s firm enough, begin kneading the dough. Incorporate more flour as needed to prevent the dough from sticking to you or the counter. Slice into the dough with a paring knife; if you see lots of air bubbles, keep kneading. The dough is kneaded when it forms a smooth elastic ball and has very few air bubbles when cut.
5. Rest the Pasta Dough: Clean and dry the mixing bowl. Place the ball of dough inside and cover with a dinner plate or plastic wrap. Rest for at least 30 minutes.
Note: At this point, the pasta dough can be refrigerated for up to 24 hours. Let it come back to room temperature before rolling.
6. Divide the Pasta Dough: Sprinkle a baking sheet generously with flour and scrape the ball of dough on top (it will stick to the bowl; use a spatula or bowl scraper if necessary). Divide the dough into four equal portions. Dust the portions with flour and cover with a clean dishtowel.
Note: Keep everything well-floured to prevent the pasta from sticking to itself or the roller as you work. If the dough starts to feel sticky as you roll it, sprinkle it with flour. Also sprinkle flour on any pasta you’re not working (rolled, cut or otherwise) with and keep it covered with a dishtowel.
7. Begin Rolling Out the Pasta: Set your pasta machine to the thickest setting (usually marked “1”). Flatten one piece of dough into a thick disk between your hands and feed it through the pasta roller. Repeat once or twice. Fold this piece of dough into thirds, like folding a letter, and press it between your hands again. With the pasta machine still on the widest setting, feed the pasta crosswise between the rollers (see picture). Feed it through once or twice more until smooth. If desired, repeat this folding step. This helps to strengthen the gluten in the flour, giving it a chewier texture when cooked.
8. Thin the Pasta: Begin changing the settings on your roller to roll the pasta thinner and thinner. Roll the pasta two or three times at each setting, and don’t skip settings (the pasta tends to snag and warp if you do). If the pasta gets too long to be manageable, lay it on a cutting board and slice it in half. Roll the pasta as thin as you like to go. For linguine and fettuccine, I normally go to 6 or 7 on the KitchenAid attachement; for angel hair or stuffed pastas, I go one or two settings thinner.
9. Cut the Pasta: Cut the long stretch of dough into noodle-length sheets, usually about 12-inches. If making filled pasta or lasagna, proceed with shaping. If cutting into noodles, switch from the pasta roller to the noodle cutter, and run the sheet of pasta through the cutter. Toss the noodles with a little flour to keep them from sticking and gather them into a loose basket. Set this basket on the floured baking sheet and cover with a towel while you finish rolling and cutting the rest of the dough.
SAVE THE DATE: “Pasta Making: Past and Present”
Join us for a Pasta Making Demo at Compliments to the Chef on September 29 from 12-3 p.m. with Professor/Chef Rocco Verrigni.